
After a run: use the right menu
Your loot has several uses. Open the menu that matches your next task; the official interface puts these tabs across the top. A tab marked Locked! is not yet usable.
On a small screen, scroll the table sideways to see every column.
| Your task | Menu | What to check |
|---|---|---|
| Improve a permanent effect | Skill Tree | The node’s effect, prerequisites, and full currency cost. |
| Make a weapon | Blacksmith | The selected recipe below the weapon stats. |
| Recruit or develop heroes | Guild | Available heroes and the requirements for their choices. |
| Review items before selling | Inventory | Keep the materials required by your selected weapon recipe. |
For a forge, write down each missing ingredient before returning to the dungeon. This gives your next run a concrete target.
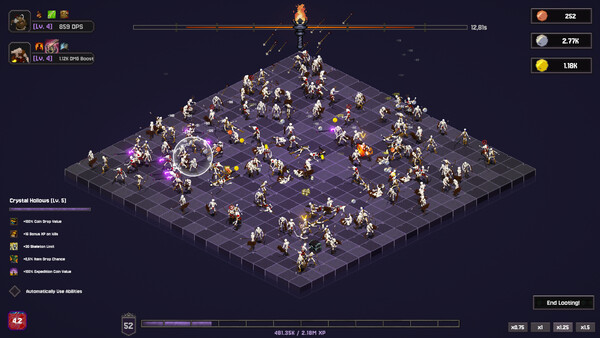
What should you spend resources on first?
Use this as a starting approach, rather than a fixed purchase order. The right choice depends on what you have unlocked and what is holding your current run back.
- Find the bottleneck. Are skeletons taking too long to clear, or are you simply missing a particular currency or crafting material?
- Compare the available fixes. A relevant skill, a weapon you can actually forge, or a useful hero upgrade may solve the problem. Read the effect and the entire cost.
- Buy for the next run. Prefer a change that helps your current party over an effect you cannot yet use.
- Check the result. Return to the same room before changing anything else. Did the purchase help you reach your resource target faster?
Need a closer look at that decision? The upgrade priority guide breaks it down by bottleneck.
Before you sell that pile of materials
Enemy drops can be sold for coins or used at the Blacksmith. Check the recipe for your next weapon first, then keep the ingredients it asks for. Selling everything may solve a coin shortage while creating a crafting shortage.
You do not need to hoard every item forever. Keep the amount your chosen recipe needs and review the rest when you know what your next purchase will be. See weapons and forging for a practical shopping checklist.
When the next room feels like a wall
Go back to a room you know and compare what you earn over the same amount of time. A tougher room is useful only if it moves you toward your current goal. Check its currency and item rewards before committing to another long attempt.
Also check your game version. The full release adds Expeditions and expands heroes, Blessings, and the Skill Tree. A Demo route can explain the basics without matching your current unlocks or costs.
Choose one upgrade, write down its missing resource, and make that the goal of your next run. Once the loop feels familiar, start experimenting with your party.
QUICK QUESTIONS
Before your next run
Should I buy every cheap upgrade?
Only if its effect helps the party or goal you are using now. A cheap upgrade that does nothing for your current setup can delay a more useful purchase.
Can I follow an old Demo walkthrough?
Use it for orientation, but check every unlock and cost in your own game. The full release includes systems and content that were not in the early Demo.
Sources & scope
Based on the full-release announcement, official store screenshots and game description, and clearly labeled Demo patch notes. Screenshots are examples, not live balance data.
Suggested comparisons and purchase decisions are editorial guidance, not playtested optimal routes. See how this guide was put together.
Found an error? Read the corrections policy with the page, game version, and supporting screenshot or source.